
I created my background using three of the sentiments from this set. I have a little trick I use to make sure I keep my stamping straight and I made a photo tutorial to explain. I draw a light pencil line from the top left corner of my card base down to the bottom right corner.

Then I center my first word over the line and then make sure each stamped sentiment is stamped identical, I eyeball the spacing in between.

After I have done the middle I draw another line parallel to the left and another to the right.

Then I use the same technique.

Erase the pencil lines and you are done.

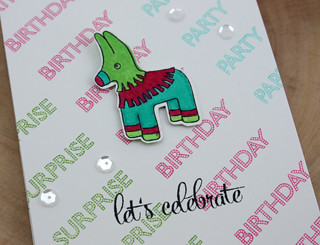
A sentiment from Everyday Expressions was masked and stamped on the card base and the pinata image was stamped, colored with Copics and then adhered with foam tape. A few sequins and it's done!
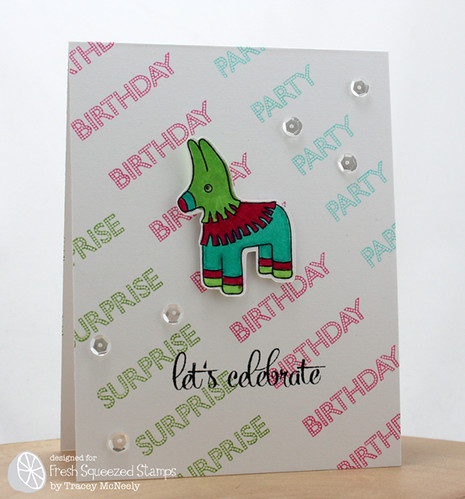
I used Life of the Party and Everyday Expressions for today's card. The perfect sentiments and image for a surprise birthday party! Pop over to the Fresh Squeezed Stamps blog today.


Cardstock: White (Papertrey Ink)
Stamps: Life of the Party, Everydayy Expressions (Fresh Squeezed Stamps)
Ink: New Leaf, Hawaiian Shores, Raspberry Fizz (Papertrey Ink) Memnto Tuxedo Black (Tsukineko)
other: assorted Copics, foam tape, sequins
21 comments :
Love this card Tracey (what fun stamps!) and your tutorial is fabulous - thanks for sharing! Have a great day :) xxx
This is so funky and your tip is very helpful. Love the touch of bling!
Love the tutorial as I never stamp straight. awesome!
love this- thanks for the tutorial
Such a cute card, Tracey! Thanks so much for the tutorial...your background is perfect!
oh so CUTE... i love it
Great background - I love that you offset the words! (and the bright, fun colours!)
What a fun birthday card. Gotta love a pinata and the candy inside. Thanks for the tutorial. Now, I know your secret--you make it look so easy.
Thanks for the tip Tracey, I love a peek into other crafter's heads LOL!! This is a super cute card!!
Love this tip and thank you for showing us. Super cute card! I would never have guess that is how to make it, so thanks.
Great tutorial! So clever...
Just as I suspected, Tracey, you are an engineer!! Thank you for sharing how you produced this outstanding and delightful piñata card!!
Cute! That little piñata is the cutest thing!!
Super fun card! Love the tip...stamping straight is so hard for me...when I really want it to be straight I get nervous and my hands shake like crazy. I need to use my ruler more!
AWESOME tutorial, Tracey! Love your tips! Thanks for sharing!
AWESOME! Thanks for the tutorial!!!!
This card is adorable! And I have to tell you I'm a bit creeped out. I posted yesterday a grid I did to stamp my own background...weird! I think maybe we are stamping sisters separated at birth :)
Love your card and the stamping tutorial! Thanks Tracey!
Thanks for the great tutorial! Love your fun card!
thanks for the tutorial...love it and your card too. Love your pinata too, is it full of sweet candy?
Love the background you created for this awesome party card and that piñata is so fun!
Post a Comment