August 31, 2021

Sending Sunshine & Rainbows

 Hi friends!

These were made for my friend Ardyth's 5K YouTube celebration hop last summer!  Well if you haven't checked lately she just hit 15K, congratulations Ardyth!

I had so many technical difficulties and ended up losing most of the video and when I pieced it back together again the audio was completely gone as well. 

I put the cards aside with intentions of repairing the video but that never happened. So here we are over a year later and I figured it was time to post. These were all made using rainbow products from Concord & 9th. I used Catherine Pooler and Altenew Inks.


August 24, 2021

Time Out Challenges #194

I know can you believe it two posts in one day. It seems to be all or nothing for me these days.

I could not let Time Out Challenges #194 run out without sharing a card inspired by my sweet friend Kim Heggins. Kim is leading this challenge and the inspiration is one of her gorgeous handmade bags!!


I was inspired by all the beautiful women on the bag. All women are beautiful regardless of our skin colour but my today my lady is beautiful in her spa towel and mask!

I used older and sadly retired Essentials by Ellen sets called Spa Day and Mirror Mirror. 


Have a great day!

Posting on Ellen Hutson Today

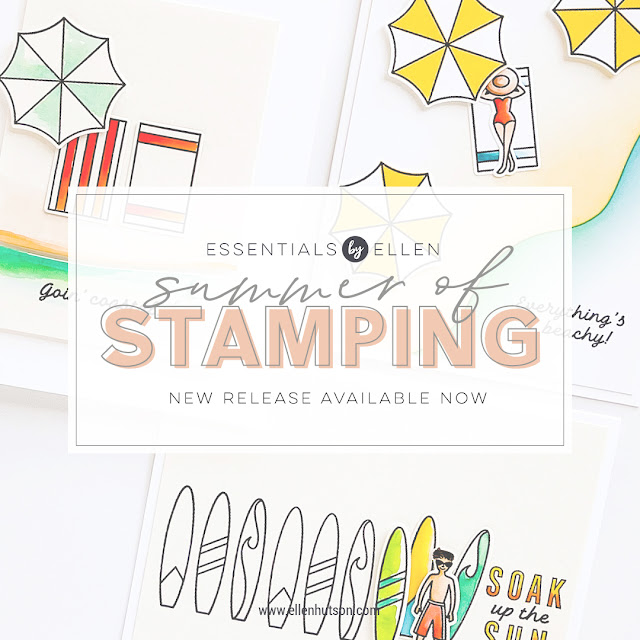
I am so excited to be posting over on the Ellen Hutson blog today! I am revisiting the Essentials By Ellen Summer Release with the Stay Cool stamp set and coordinating Stay Cool dies.

 Today I am looking at the set with fresh eyes and made a few cards focusing  on the graphic images! Head over to the post for detailed instructions about how I made my cards HERE

If you are looking for some more inspiration from this set I posted some icy summer treats HERE when it was first released.

See you over at the Ellen Hutson blog.


August 9, 2021

Color Hues Challenge #23

 Hi there, over the weekend I had a chance to play with some new to me PinkFresh stamps and dies.


I chose to use the colors from the Color Hues Color Challenge #23.

For my first card I used the stamps and the co-ordinating stencils to shade my butterfly pink and yellow.

The second card I did also with pink and yellow but I only used the stencils, with gave me a pinky peach colour through the centre of the butterfly! The sentiment was foiled in gold but you can't see it in the picture.


Thanks so much for stopping in today!


August 3, 2021

Missing You

Hi there friends, I know two days in a row--LOL!

I have a post up on the Birch Press Design blog today using the Tranquility Layers dies and the new Brush Sentiments stamp set. These cards are perfect to send to someone you have been missing during the pandemic.


I began by cutting two each of the Tranquility Layers die set using white heavyweight cardstock. I usually save this cardstock for my card bases. However when I want the main die cut image or sentiment to really stand out I do use the heavier weight cardstock.

I cut one die from the Tranquility Layers die set through a 5 1/2" x 4 1/4" panel of white cardstock. Then I taped the panel to another panel of the same size with low tack tape. This creates a well for the die cuts for blending colour on to them.

I glued each layer together before I added colour to them, I usually do the gluing after but I am trying something different. Starting with Layer A, the one with the largest openings, I set the die cut into the well so that it doesn't move around while I blend colour on to it. I kept the centre in place when blending my colours. You could do the centres in a completely different colour but for today I am treating it as a whole. I started with a very light hand blending a rainbow of pink, red, peach, yellow and green on a diagonal. I used Distress Oxide inks.

Next I moved Layer B into the well and did the same colours this time putting more colour down but still not heavy handed.

Finally I put Layer C into the well, this is the die cut that has the smallest size of holes. I used the same colours but I put these on with a heavy hand to really show the depth of the colours.

This is what my stencil well looked like after blending. then after I removed the top panel! To pretty to toss away. Can you see that while I was blending over the layers that it created another image on the bottom panel under the well. We will get to that later on. I will set it aside for now.

To finish out this card I glued the three thick layers together and the results are gorgeous. The double thick die cuts add so much more dimension. Thanks Jennifer McGuire for the tip!

I cut a 5 1/4" x 4 1/4" panel using Radial Pinpoint cover die as a background for my mandala. Next I cut the Hello Honey Script die three times with heavyweight while cardstock and glued it together. I did not use the shadow, only the word. This will sit in the centre of the mandala. Before gluing everything down I stamped the sentiment "I miss seeing you' from the Brush Sentiments clear stamp set on the bottom right corner of the Radial Pinpoint cover die. I added a few Pastel Fairy Jewels to finish it off.


I didn't think I was going to use the panel that underneath my well, but it was too pretty not to use. what happened next was an embossing mistake I think all of us have made at one time or another. I had my plates mixed up in my sandwich and instead of embossing over the image I cut it with the Layer A die and all the teeny tiny pieces! I was too far into it now to back out, so I put a piece of double sided adhesive paper on to the back of the die cut to pick all the pieces up together. That worked great but now the front of my die cut was surrounded by adhesive. Out came the scissors and I fussy cut around the outside of the die to get rid of it. Then I put the mandala onto a panel of cardstock that was a bit smaller than the card base, added a sentiment also from the Brush Sentiments clear stamp set and added some Bright Fairy Jewels.


Thanks so much for stopping in today, have a fabulous weekend.

Eassentials by Ellen Summer Stamping Release - Stay Cool

Hi there friends!

Back after a bit of a craftcation! That works doesn't it--lol??
I was lucky to have a chance to play with the new Essentials by Ellen Summer of Stamping Stay Cool stamps and Stay Cool dies which is part of their new Summer of stamping Release!


This new release is perfect for summer and I really hope to see lots of warm weather in August. July was a bit too rainy and cool for me but creating with this fun new stamp set has put me in the need for a hot day and a cold popsicle!


I have three cards to share with you today. For this first one the popsicles are stamped directly on to a panel attached to a card base with Catherine Pooler Inks--Sauna, Fiesta Blue and Tutti Frutti. I did some ink blending around the edge of the panel.


My next card includes 5 popsicles that were stamped, die cut and added to a panel with foam tape and once again using Catherine Pooler Inks--Party Dress, Orange Twist, Tiki Torch, Limoncello and Lime Rickey.


For my third card I made watermelon ice pops by ink blending a panel with Distress Oxide Inks--Mowed Lawn, Twisted Citron and Festive Berries. I used the dies to create three ice pops from my panel. The background was a blended using Distress Oxide Inks--Mowed Lawn and Twisted Citron. The watermelon seeds are an image from the Stay Cool stamp set that were stamped in black and clear embossed.

I love that each of the sentiments has it's own co-ordinating dies. I cut the dies three times and glued them together to make them stand out from the design.

Thanks so much for stopping by today!