Showing posts with label Essentials By Ellen. Show all posts

November 4, 2021

Ellen Hutson Guest Design

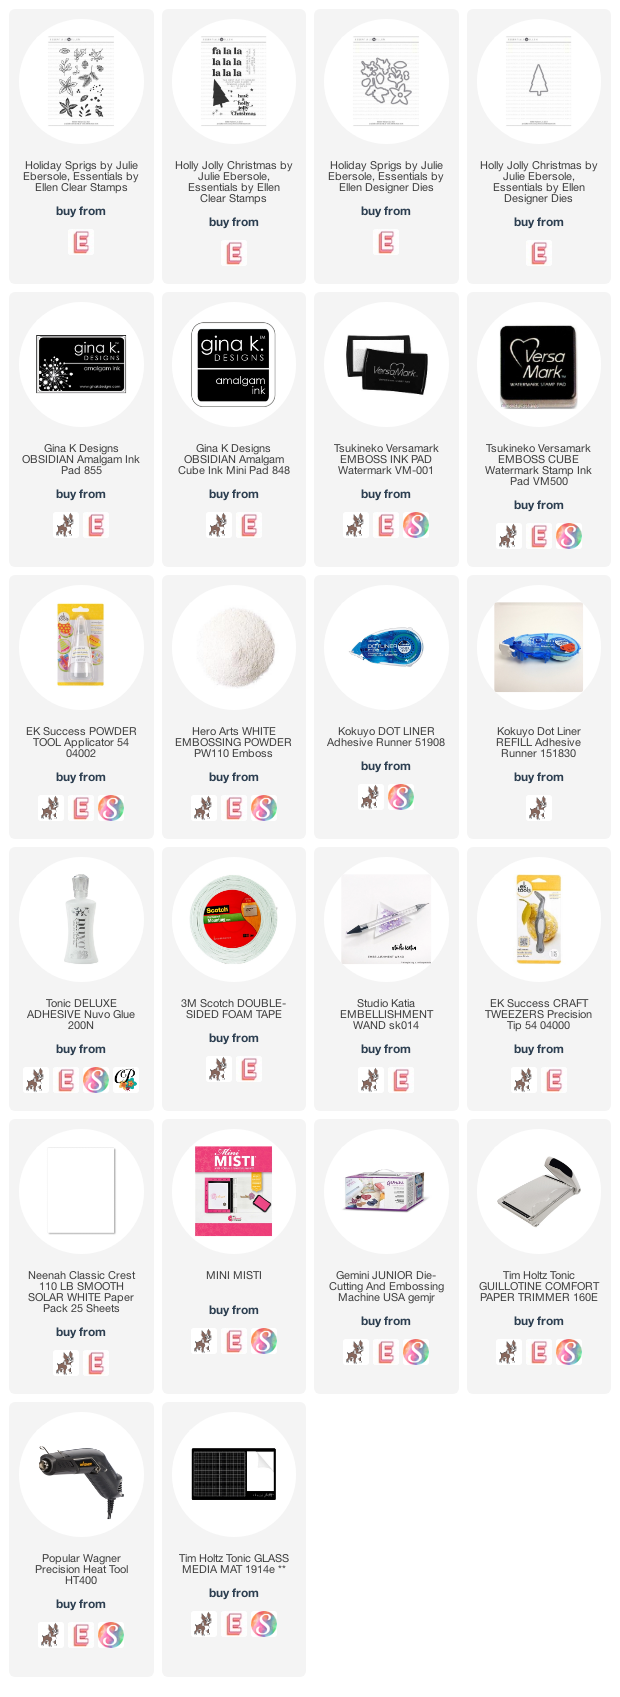
Hi there friends! I'm really excited to be posting again over on the Ellen Hutson blog! I'll be revisiting products from the most recent Essentials by Ellen Winter and Christmas Release, which is available for purchase at Ellen Hutson!


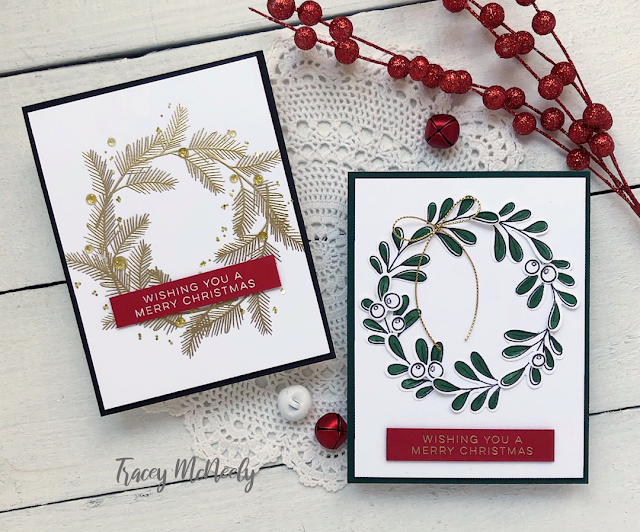
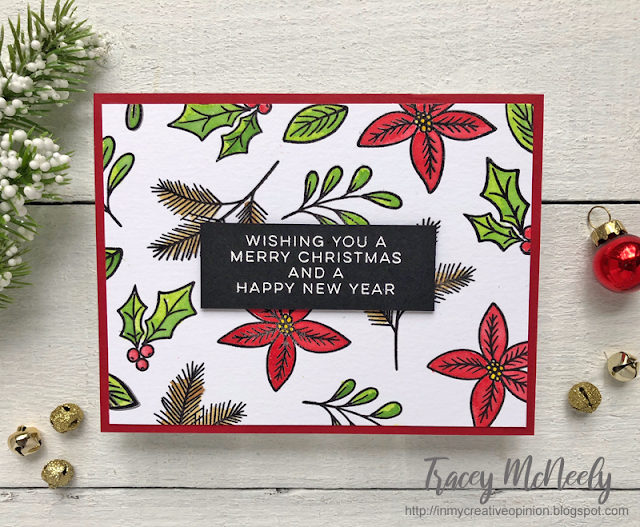
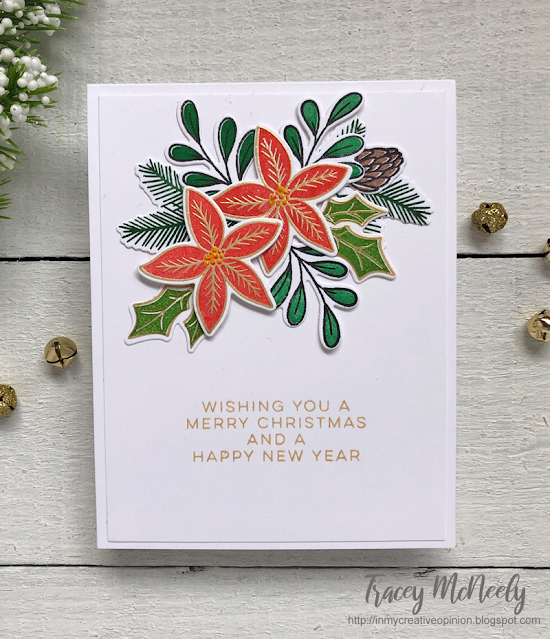
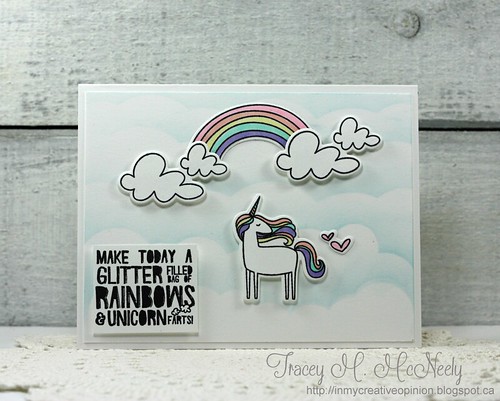
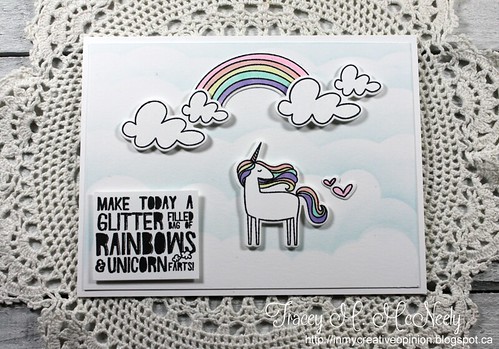
One of my favourite things to do with a stamp set that contain individual images of foliage is make it work to create a wreath, regardless of the season! Today each of my cards will have a wreath that I made using different branches from the Holiday Sprigs stamp set and the co-ordinating Holiday Sprigs designer dies. The first card feels a little more traditional and elegant where the second is a bit more artsy!


I usually begin a design by drawing a quick sketch of what I want to do, or in the case for this card I made a sample to make sure that my idea would actually work. Some days the recycle bin is full, and some days it’s back to the drawing board. The sample is usually quite messy by the time I’m finished with it, and there have been occasions when my sample turns out better than the finished product. Does that ever happen to you? My sample usually becomes an integral part of the overall creative process and before it hits the recycle bin for the last time it’s usually covered with stamping, embossing, Copic marker, inks and most times illegible scrawls—lol!

 Once I knew that my design was going to work I went ahead and made my wreath base using the pine branch from the Holiday Sprigs stamp set. I cut a 5 ¼” x 4” panel of cardstock and used the Essentials by Ellen Circle Designer Dies to create a circle in pencil where I want to put my wreath. I used a 3” circle die and lightly traced around the outside of it with a pencil. The branches and embellishments typically cover the pencil lines pretty well so usually there isn’t a need to erase.

 With my magic bag I rubbed it over my panel well so that I didn’t end up with embossing powder where it’s not meant to be. Now this is where I go a little wild and I freehand stamp the wreath using a watermark ink pad and an acrylic block, no MISTI. I embossed the wreath with Hero Arts gold embossing powder.


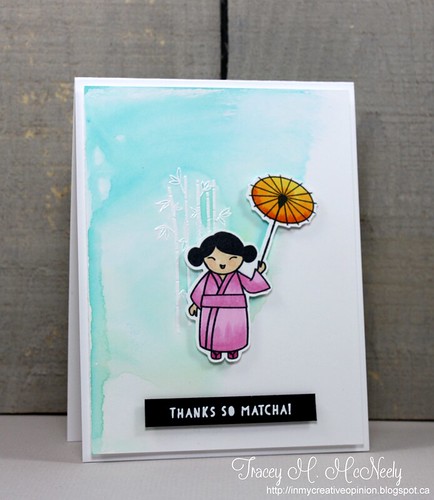
A sentiment from the Holly Jolly Christmas stamp set was masked, stamped and embossed with WOW Bright White Opaque embossing powder on red cardstock and then added to the card with foam tape.

 TIP: Use your magic bag for more than just embossing powder to keep the surface slick. Your embossing bag helps prevent other powders and glitter from sticking to everything.

 I added a few gold sparkle jewels in various sizes on and around the wreath. Then I dotted a ZIG Squeeze & Roll 2 Way Pen around the outside of the wreath and sprinkled Studio Katia Gold Fever Glitter over the card. Just the right amount of sparkle!


For my second card I used the mistletoe branch from the Holiday Sprigs stamp set to create a die cut wreath.


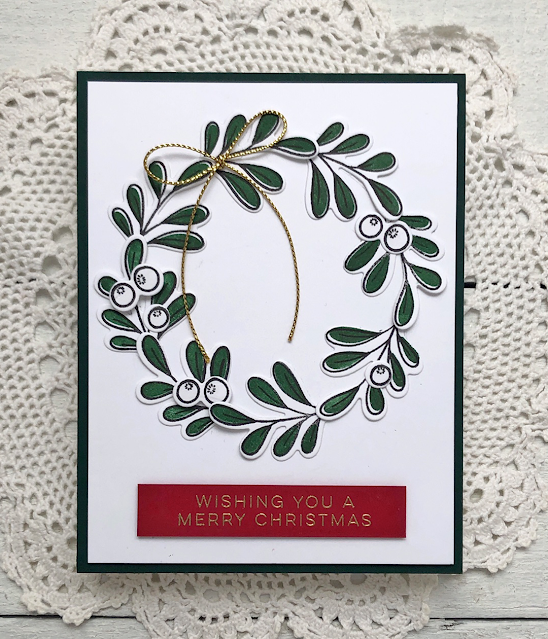
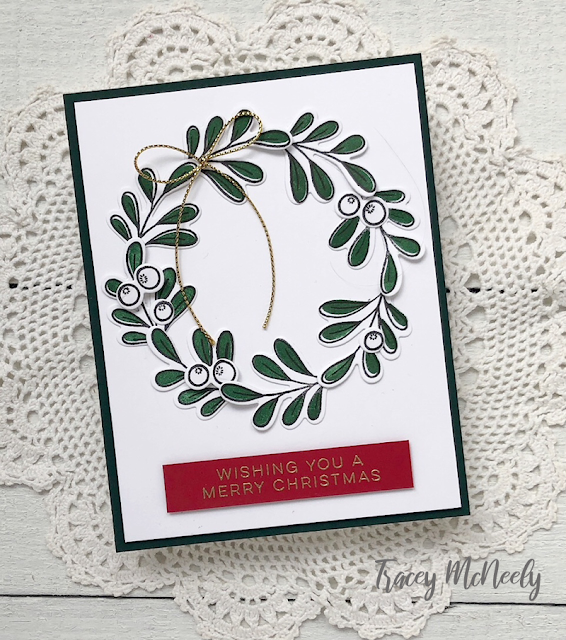
Just like the first card I created a pencil circle for my wreath shape but this time a bit higher up on the panel. This was so I would have enough room to put a sentiment below the wreath. I stamped the outline mistletoe branch 8 times using black ink. Then I stamped the co-ordinating solid image over top using Concord & 9th Evergreen ink. Using the Holiday Sprigs dies I cut the branches. The dies for this set are so easy to line up with the stamped images! That is such a game changer for me.

Working clockwise, I started building my wreath by adhering the mistletoe branches one 
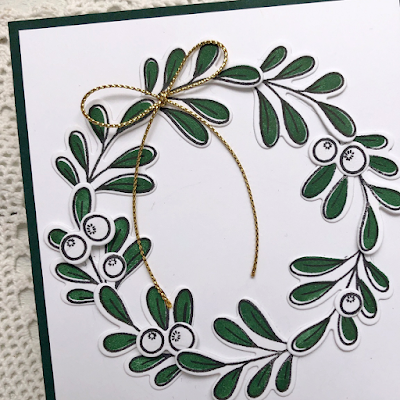
at a time to the pencil line using my favourite Nuvo Deluxe Adhesive liquid glue. I tucked the stem of the next branch under to top leaf of the bough to give it a little dimension. I used 8 branches for my simple wreath but you could add as many branches as you would like for a fuller wreath.


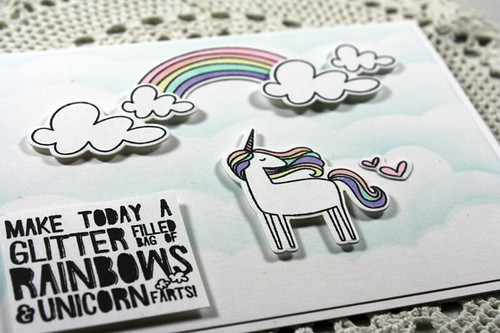
 Once the wreath was complete I added some berries from Holiday Sprigs. They were stamped on white cardstock and cut with the Holiday Sprigs I tucked a few of them along the wreath and then added some of the elusive, clear ZIG Wink of Stella. over them. That is for the eye of the beholder.

 I used the same masked sentiment from Holly Jolly Christmas. This time I embossed it with Hero Arts gold embossing powder and then added it to the card with foam tape.

 A staple for me with my holiday card and tag making is May Arts metallic gold string and May Arts metallic silver string. I love having something so simple to make something a little more special. So I finished it with a simple bow and called it done!


Thanks so much for crafting with me and so much love to the team at Ellen Hutson for inviting me back to the blog today.

 ~Tracey

October 15, 2021

Essentials by Ellen Winter and Christmas Release

The Essentials by Ellen Winter and Christmas Release is available right now at Ellen Hutson!


Also with this new release Ellen Hutson has a gift for you when you spend $75 or more. Your gift is added to your cart automatically once you have $75 in your cart!


I had a chance to play with some of the new products and I have a few cards to share with you today.

For this first card I used an assortment of images from the brand new Holiday Sprigs stamp set. The images were randomly stamped on a 5.5 x 4.25" panel of  Tim Holtz watercolor paper using VersaFine Onyx black ink and clear embossing powder. I watercoloured the images using Distress Inks and then the panel was trimmed down to 5.25 x 4". I matted it with red cardstock and the white embossed sentiment is from the new Holly Jolly Christmas stamp set.


For my next card I stamped the outline images from the Holiday Sprigs stamp set with Gina K almalgam ink. Next I stamped the images a second time using the cordinating solid image and Concord & 9th inks. Once dry I die cut the images with the new coordinating Holiday Sprigs dies. The images were arranged and adhered to a white matted top folding card base with glue and foam tape. The same sentiment from the Holly Jolly Christmas stamp set was gold pearl embossed on the card front.


For my final card is a bit more playful. I created a background using the tree from the Holly Jolly stamp set then I trimmed the panel down to 4.25 x 4.25 and added it to my card base with foam tape. The big red Fa la la is from the same set was white embossed and added over the trees in the upper panel. The perfect sentiment from the movie Elf in black at the bottom!


This is such a fantastic Christmas Release so much to get your cards done for this yeat. Head over to Ellen Hutson for all the details and to get your free Gift With Purchase!!

All the products I used for today's cards are listed below for your convenience.
NOTE: Affiliate links used at no cost to you. See my Disclaimer for details.\

Have a great day!


August 24, 2021

Posting on Ellen Hutson Today

I am so excited to be posting over on the Ellen Hutson blog today! I am revisiting the Essentials By Ellen Summer Release with the Stay Cool stamp set and coordinating Stay Cool dies.

 Today I am looking at the set with fresh eyes and made a few cards focusing  on the graphic images! Head over to the post for detailed instructions about how I made my cards HERE

If you are looking for some more inspiration from this set I posted some icy summer treats HERE when it was first released.

See you over at the Ellen Hutson blog.


August 3, 2021

Eassentials by Ellen Summer Stamping Release - Stay Cool

Hi there friends!

Back after a bit of a craftcation! That works doesn't it--lol??
I was lucky to have a chance to play with the new Essentials by Ellen Summer of Stamping Stay Cool stamps and Stay Cool dies which is part of their new Summer of stamping Release!


This new release is perfect for summer and I really hope to see lots of warm weather in August. July was a bit too rainy and cool for me but creating with this fun new stamp set has put me in the need for a hot day and a cold popsicle!


I have three cards to share with you today. For this first one the popsicles are stamped directly on to a panel attached to a card base with Catherine Pooler Inks--Sauna, Fiesta Blue and Tutti Frutti. I did some ink blending around the edge of the panel.


My next card includes 5 popsicles that were stamped, die cut and added to a panel with foam tape and once again using Catherine Pooler Inks--Party Dress, Orange Twist, Tiki Torch, Limoncello and Lime Rickey.


For my third card I made watermelon ice pops by ink blending a panel with Distress Oxide Inks--Mowed Lawn, Twisted Citron and Festive Berries. I used the dies to create three ice pops from my panel. The background was a blended using Distress Oxide Inks--Mowed Lawn and Twisted Citron. The watermelon seeds are an image from the Stay Cool stamp set that were stamped in black and clear embossed.

I love that each of the sentiments has it's own co-ordinating dies. I cut the dies three times and glued them together to make them stand out from the design.

Thanks so much for stopping by today!


October 24, 2019

Mighty Oak

tracey_MondoOak_wccloseup


I finally had a chance to play with the Ellen Hutson Mondo Oak stamp set!
I just love the great big leaf, it just begs to be ink blended!


tracey_MondoOakset


I blended the big oak leaf with Distress Oxide Inks--Squeezed Lemonade, Wild  Honey, Spice Marmalade and Ripe Persimmon. After the panel was dry I stamped, clear embossed and die cut it using the co-ordinating die!


tracey_MondoOak_bristol


This next one has a bit more texture. I smooshed a panel of watercolour paper into the same colours of Distress Oxide Inks that were lightly spritzed with water. Once it was dry I also stamped, clear embossed and die cut it using the co-ordinating die! The same colours, a it different technique and they both turned out very different!


tracey_MondoOak_wc


Thanks so much for stopping in today!


July 8, 2018

Essentials By Ellen July Release '18

tracey_EHunicorn_cover


The new Essentials by Ellen July Release is available for sale!

I created a FUN card using the new Unicorns 'N Rainbows Stamp Set designed by Julie Ebersole! This whimsical Unicorn may have made a foo-pah, but you can't be offended when he is this cute--Sorry mom!

The images were die cut with the new Unicorns 'N Rainbows Designer Dies


tracey_EHUnicorn


Hard to see the elusive Clear Wink of Stella (still my go to when I want to add shimmer to card) painted over all of the images! It just doesn't like the camera! Just try to imagine, it is beautiful in real life!


tracey_EHUnicorn_flat

The clouds on the rainbow were offset so that the design was asymmetrical, adding more whimsy to these fun images. I added lots of dimension to this one!

tracey_EHUnicorn_dimension


I will be sharing more cards that I have have made this week.
These links are for all the new products released today for your convenience. Thank you if you shop through my links at no cost to you. I appreciate your support.

Have a wonderful day!

June 10, 2018

Essentials by Ellen June Release

tracey_EBEwoodsy_cover


Yay it's Sunday and the new Essentials by Ellen June Release is available for purchase at Ellen Hutson LLC! I had the pleasure this month of playing with the newest Leading Ladies, this month there are three being released.

I did a sneak peak earlier this week of the new Essentials by Ellen Leading Ladies - Woodsy Lad clear stamps by Brandi Kincaid! She was stamped and die cut using the new Essentials by Ellen Leading Ladies - Woodsy Lady designer dies. I made a fun background for her by smooshing three Distress Oxide inks onto a Bristol Smooth cardstock panel. I used Walnut Stain, Peeled Paint and Broken China. Really easy, I laid all three colours on my craft may beside each other but not touching and then spritzed with water and one swipe!

tracey_EBEwoodsy

I used the newly released Essentials by Ellen Pattern Pattern Play clear stamps by Brandi Kinkaid to make a camouflage pattern on her vest! This is a fantastic set and is so perfect for adding pattern to and of your Leading Ladies clothing and accessories!

tracey_EBEwoodsy_vest

I created an inverse mask for her vest so that I could stamp on the vest and not on the rest of her. There is a tiny leaf stamp in the Pattern Play set that I flipped over and used the back of the stamp to randomly stamp all over her vest with three shades of green ink and two shades of brown ink until I filled in all the space. I removed the mask and voila--a camouflage patterned vest!

Woodsy Lady comes with all kinds of cute 'woodsy' accessories.

tracey_EBEwoodsy1

I have a feeling that all this month's Essentials by Ellen Leading Ladies and going to fly off the shelf. Get your before they are gone. I have provided affiliate links below for you, affiliate links used at not cost to you.  I will be back later to share another card made with the new Essentials by Ellen Leading Ladies - Beach Lady!


March 8, 2018

Essentials By Ellen March Release | So Matcha

tracey_SoMatchacover


Last weekend when I was Stamping Away in Kansas we were treated so well by our sponsors we were thrilled to receive from Ellen Hutson some stamps from the new March Release at Ellen Hutson. Today I have a card using the Essentials By Ellen So Matcha clear stamps that were designer by Julie Ebersole and inspired by her recent trip to Japan!

My background was created with Distress Oxide ink smooshing over the white embossed bamboo from the stamp set. The whole panel was adhered with foam tape. The girl was coloured with Copic Markers and both her and her sentiment were also popped up with foam tape.


tracey_SoMatcha

These are the Copics I used...


Thank you so much Ellen Hutson!

September 17, 2017

Essentials by Ellen Baker Lady

IMG_3286


The newest in the Leading Lady line at Ellen Hutson LLC is Baker Lady. She is just in time for all your holiday gift making and cards.

I am still a learning about Copic colouring so I Love it when Kathy Racoosin does the 30 Day Coloring Challenge because it pushes me to work on my skills a little each day. I am super excited because this coming weekend I am meeting up with my friends Ardyth Percy-Robb and Natasha Kara and we are go to meet and colour for the day with Kathy Racoosin on The Coloring Challenge Roadtrip!


I watched Sandy Allnock's video colouring Baker Lady last week during one of the blog hop's in The Classroom at Ellen Hutson. I paid very close attention to how she coloured her skin and tried to transfer her instructions for colouring hair to make my lady's hair blonde. I have lots of work to do in that department-lol! When it came to colouring the cake I used exactly the same colours as Sandy. Thanks for the great tips Sandy! This is my colouring for Day 17.


tracey_sweeter


A closer look:

IMG_3284