January 31, 2021

A New Year of Birthdays


Happy Saturday!

After what has been a bit of a break for the 12 Kits of Occasions we are back today sharing what we have made with the January kit! I was the hostess for this month and I sent everyone a birthday themed kit to play with. After the holidays I thought this would be a fun change.

I hope that you hop along today over at the 12 Kits of Occasions. My Teammates and three special guests have lots of fabulous cards to show you too!

I made 7 cards for today with my kit.
The papers from Vicki Boutin's Let's Wander were the perfect mix of patterns for both masculine and feminine cards as well as cards that can be very gender neutral.

My first two cards were a twofer. I ink blended the MFT Stamps Big Birthday Wishes using Distress Inks in rainbow order. I used the main piece for my first card and made a shaker card.


All the pieces that came out of the first die cut to create a second card. I made a slimline card, inlaying the pieces therefore the twofer!


Thanks for popping in today, make sure you have a look at what the rest of the team has made!

January 25, 2021

Craft Roulette with Mary Gunn #45

Last Friday, I was Live on Facebook with Mary Gunn at Craft Roulette!

Craft Roulette is a fun crafty game show see the details here: www.craftroulette.live

The basic premise of the show is that after a conversation with Mary she spins the wheel with all the crafty possibilities to decide what we are going to make!
Fun right?


Mary is so delightful and we had so much fun crafting together.  I had lots of Internet/technical difficulties during the Live, so most of my crafting time with Mary was caught up in lag. 

However, if you are interested to see the show it's on the Craft Roulette YouTube channel here:  www.youtube.com/craftroulette - episode #45!

So here are the parameters chosen by the wheel:

Project: Gatefold Card
Colours: yellow, green and blue
Element: Snow man
Random: Shimmer


I formulated a plan, started my card and then when I was about half finished I wasn't feeling it. So not surprising for me, I started again! Yikes! I ended up going back and reworking the card I initially started yesterday afternoon. So I have two cards to share with you and two more to add to my Christmas 2021 stash!


For my first card I started with a 8 1/2" x 5 1/2" piece of Bristol Smooth cardstock. I blended Tumbled Glass and Peacock Feathers Distress Oxide over both sides of the panel. Then I splattered some watered down white acrylic paint on to both sides of the panel, leaving it to dry in between.

Once dry score the long side of the panel at 2 1/8" and 6 3/8" or the way I did it, score at 2 1/8" and turned my panel 180° and score at 2 1/8" again.

Inside the panel I put the cute, cute snow man from Honey Bee Stamps Snow Buddies stamp set. I stamped and cut the snow man, scarf, hat and ear muffs. Then I coloured his nose 'yellow', his scarf, hat and ear muffs green. I glued his scarf and I decided to use the ear muffs then I  and added a sentiment from Honey Bee Stamps Jingle All the Way stamp set.

I sprayed the entire inside of the gatefold with Tsukineko Sparkle Sheer Shimmer Spritz and set it aside to dry. Once dry, I added a Birch Press Design Frosty Flake snowflake die cut to the front of the closed gatefold. I glued half of the snowflake on to the right side of the panel so when you open the card it stay's attached to the right.

Parameter checklist:

Project: Gatefold Card 
Colours: yellow, green and blue  
- yellow nose and twine for card closure
- green scarf and hat 
- blue background  
Element: Snow man 
Random: Shimmer    
- Shimmer Spray


Now back to the first card I started on Friday. I started the card by stamping the snow man, masking him off and using the Studio Katia Snow-Fetti stencil, I stenciled around him with blue snowflakes. It looked really cute, but it was too subtle.

When I came back to it I created another background like I did for the first card.
Then I grabbed a circle die, a great way to save a design from the recycle bin, and I cut the snowman with his snowy background out. I finished colouring him the same way I did on the first card.

I white embossed Merry Christmas from the Concord & 9th Christmas Tree stamp set to the bottom centre inside the card. I adhered the snowman circle above the sentiment and then popped his hat on top.

I adhered another snowflake to the front of the card the exact same way I did with the first card.


I finished off both cards by tying the card closed with 'yellow' twine and then once again with silver cording. Which do you prefer?


Head over to www.craftroulette.live and find out all about the show.
Thanks so much for stopping in today. 


January 11, 2021

Mass Producing Beautiful Quick and Easy Cards

I have a big post up on the Studio Katia blog today!
I was busy making Christmas cards using snowflake stencils from Studio Katia!

I made two sets of cards using the Studio Katia Snowflake stencil and the Floral Snowflake stencil. I used them along with Distress Oxide inks and Distress Oxide Sprays to quickly create some what are some of my favourite designs this year!


I used the Studio Katia Snowflakes stencil for this first set of cards. I began with a panel of Bristol Smooth cardstock. I sprayed the back of the Snowflake stencil with Pixie Spray, it makes keeping your stencils flat and in place so easy. I adhered the stencil, sticky side down, to panel so the snowflake is off the edge. I began by blending Scattered Straw Distress Oxide ink in the centre of the snowflake. Then working out from the centre I blended Seedless Preserves, Picked Raspberry and Spun Sugar Distress Oxide inks with the Studio Katia Ink Blender Brushes until I was happy with the blend. I intentionally did not cover the entire panel with ink, I let the Spun Sugar just fade off.


Each panel ended up a bit different depending on my ink blending, I wasn't too worried about getting the stencil spotless between each card. While cleaning off the stencil on my media mat I noticed the ink colours were seeping under the stencil. It looked like watercolour on the back, so I quickly grabbed another panel of Bristol Smooth and dropped the stencil on it. I wish I could have been able to get a better photo for you but this one turned out so fun. My favourite Christmas card I made!


Once all of the panels were dry I die cut them using the stitched rectangle from the Darling Ribbons & Trims die set. This gives a nice finish to the edge of the panel. The sentiment, Peace on earth, from the Poinsettia Border stamp set, was stamped and heat embossed with Wow Gold Pearl embossing powder on all the cards. Six cards and a bonus 7th!


For the second set of cards, I used Distress Oxide ink and Distress Oxide Sprays and with the Snowflake stencil and the Floral Snowflake stencil.


The first group were all made with the Snowflake stencil. Just like I did with the last set of cards, I cut nine panels of Bristol Smooth cardstock. I sprayed the back of the Snowflake stencil with Pixie Spray, adhered the stencil to the panel and put it into my Spray box. I sprayed Distress Oxide Sprays on to the panels one at a time using a variety of blues Distress Oxide Sprays--Peacock Feathers, Salty Ocean, Mermaid Lagoon, Faded Jeans and Cracked Pistachio. So fast, so fun and so pretty.


The next two cards are a bit different the first card uses Twisted Citron and Cracked Pistachio Distress Oxide Spray along with the Snowflake stencil.


For these next two cards I started by blending some Tumble Glass Distress Oxide ink onto the two panels just around the edge and keeping the centres mostly white. I used the Floral Snowflake stencil using Abandoned Coral and Cracked Pistachio Distress Oxide Sprays.


Once all of the panels were dry I die cut them using the stitched rectangle from the Darling Ribbons & Trims die set just like I did with the first set. All the sentiments were from the Gift Tags Greetings: Winter stamp set. Once everything was assembled I sprayed the panels with clear Glimmer Spray for extra shine and set them aside to dry.

A couple hours in my studio and I ended up with 16 Christmas cards!


January 8, 2021

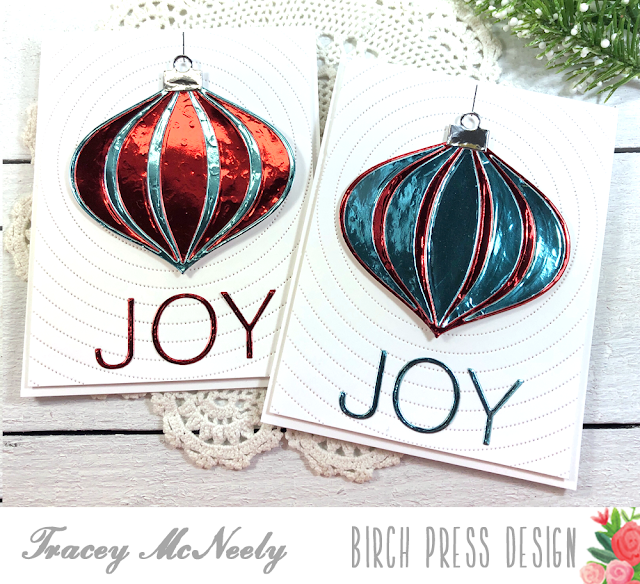
A Few More 'Foil' Christmas Cards

Hi friends, sorry that It's been so long since I posted. After the 25 Days of Christmas Tags wrapped up I I changed gears and took a much needed break from crafting. It was not easy to step away from my craftroom but I was struggling to find my mojo and I told myself I was not going to make another card until I was creating from my heart and not from a deadline. After Christmas I was doing some tidying and I realized that I had not created any card with the ornament dies and the polished foil papers. So an idea was born...

I am up on the Birch Press Design blog today with a quick how to for making these brushed foil Christmas cards...for next year!

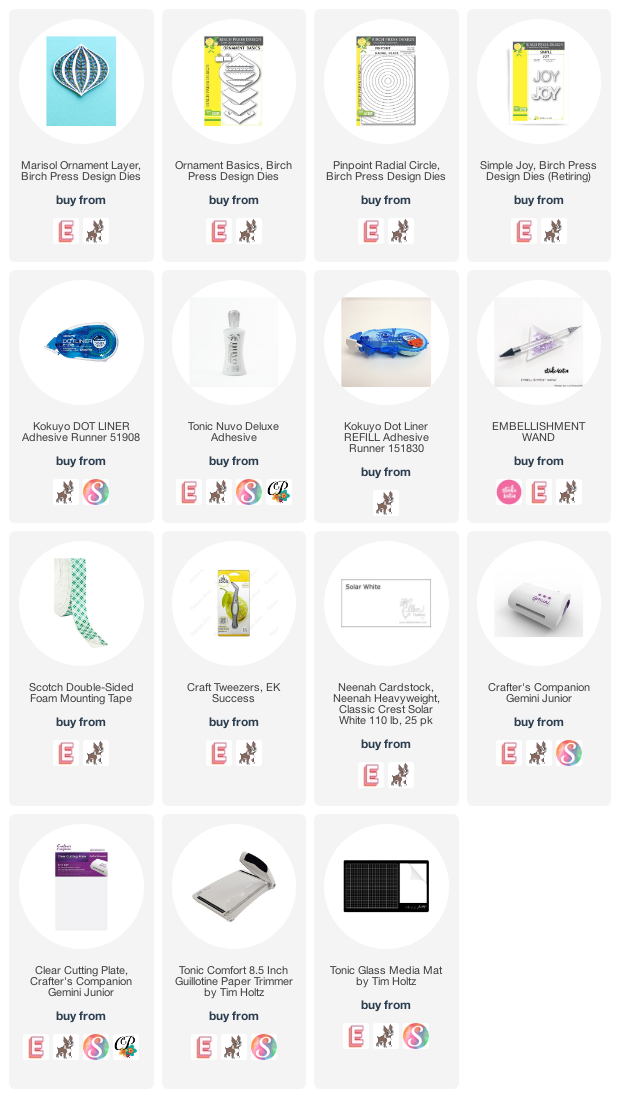
I made three cards using the Birch Press Design Marisol Ornament Layers dies and the Memory Box Polished Foil paper pad.


Full details are on the Birch Press Design blog.
Hope you have a chance to head over and say hello!