
May 20, 2011
Happy Victoria Day Weekend Canada!
It's finally here, the May 2-4 weekend! Although I wish the forecast was for sun and hot all weekend, just a chance to chill with my family is good enough for me. Enjoy.

May 7, 2011
Crazy for Teapots
After two years I finally purchased the Papertry Ink Tea for Two stamp set. Along with it the Teapot/Label die. This is the set that I am using to create Mother's Day cards for my mom and my mother-in-law. An easy task for a Friday afternoon when there wasn't much on my plate. That is until I started inking up my stamps that is. I had a blast! I had to test all the stamps. I started just stamping teapots, then I die cut teapots and stamped on them, then I die cut some of the already stamped images (I had been wanting to try that), then I stamped the outline image onto already stamped and die cut teapots, then I stamped the labels on some die cuts, them I die cut some teapots using vintage looking patterned paper and then stamped the outline image on to those. Can you say squeal with delight?

By that time I had to get on with the real world and say bye bye to my studio. Up at 6:00 am this morning for my daughter's dance competition. Two golds!! Woo Hoo! and now I am back still needing to turn my teapots into fabulous cards.
It is 11:00 pm and they are done.


By that time I had to get on with the real world and say bye bye to my studio. Up at 6:00 am this morning for my daughter's dance competition. Two golds!! Woo Hoo! and now I am back still needing to turn my teapots into fabulous cards.
It is 11:00 pm and they are done.


All Supplies from PaperTrey Ink unless otherwise noted:
Cardstock: white, kraft
Patterned Paper: Girl Friday (Cosmo Cricket)
Clear Stamps: Tea for Two
Ink: Hibiscus Burst, Summer Sunrise, Creamy Brown (Colorbox)
Dies: Teapot, Label, Double-Ended Banner
Other: Printer, Foam Distressing Tool (Ranger)
April 28, 2011
Make It Monday Challenge #12 - April 25
This week Nichole Heady did a video tutorial on how to easily draw a black line frame around an image on your cards. Its took me, butterfingers, a few tries to get it right but I am pleased with the end result. My card is now ready to be customized with a sentiment inside. I like having some generic cards on hand so that when an occassion comes up I can just pop in a suitable sentiment and the card is ready to go. Thanks for dropping by.


All Supplies from PaperTrey Ink unless otherwise noted:
Cardstock: white, Raspberry Fizz (PaperTrey Ink)
Clear Stamps: All About You (PaperTrey Ink)
Ink: Raspberry Fizz, Summer Sunrise, (PaperTrey Ink.), Shabby Shutters (Ranger)
Other: Black Zig Marker
April 25, 2011
Papertrey Blog Hop - April 25
This month Papertrey's Blog Hop was dedicated to the men in our lives. We were challenged to focus on masculine color schemes, fresh pattern combinations, understated embellishments and unique uses of images you may already have in your stash!
My husbands birthday is coming up in May so I took this opportunity to get a head start on his gift. I chose Dark Chocolate and Simply Chartreuse for my colour scheme. Dark Chocolate Cardstock was matted with Bitty Dot Basics then a simple embellishment was made with Vintage Cream felt topped with a Simply Chartreuse pinked circle stamped with a Tag-its #2 frame and birthday cake from Tag-its #1.The circle was adhered using foam tape. The sentiment at the bottom of the card was from Make a Wish Additions and also adhered with foam tape. Rounded corners and chcolate brads finished off the card.


My husbands birthday is coming up in May so I took this opportunity to get a head start on his gift. I chose Dark Chocolate and Simply Chartreuse for my colour scheme. Dark Chocolate Cardstock was matted with Bitty Dot Basics then a simple embellishment was made with Vintage Cream felt topped with a Simply Chartreuse pinked circle stamped with a Tag-its #2 frame and birthday cake from Tag-its #1.The circle was adhered using foam tape. The sentiment at the bottom of the card was from Make a Wish Additions and also adhered with foam tape. Rounded corners and chcolate brads finished off the card.


All Supplies from PaperTrey Ink unless otherwise noted:
Cardstock: Dark Chocolate, Dark Chocolate Bitty Dot Basics, Simply Chartreuse
Stamps: Tag-its #1, #2 and Make a Wish Additioins
Ink: Dark ChocolateDie: Flower Fusion #1
Dies: Mat Stack #1, Double-Ended Banners
Other: Chocolate Brads, Corner Chomper, foam tape
April 22, 2011
Easter Cards
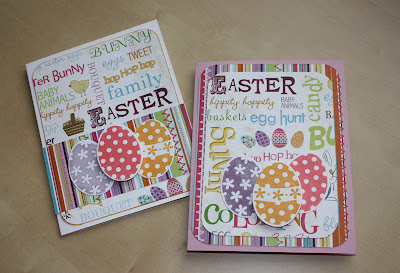
Happy Good Friday Everyone! Just popping in today to share a couple of cards I made for my two kids this Easter.
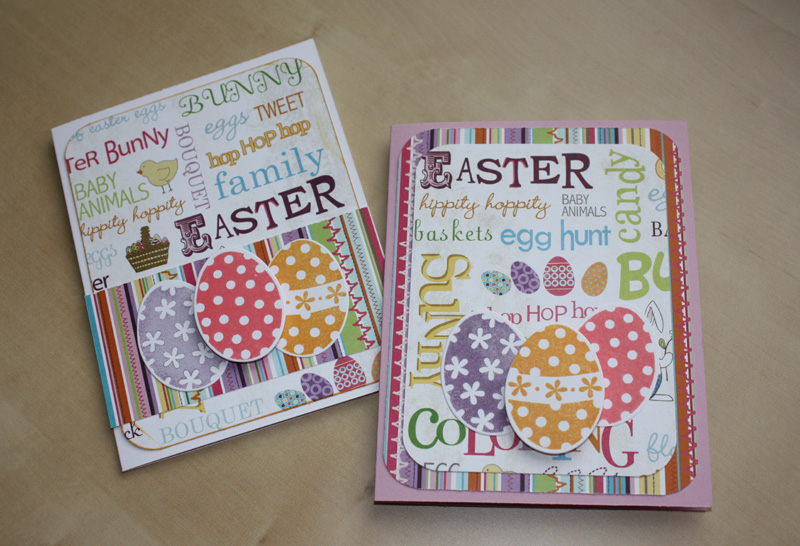
Cardstock: white (PaperTrey Ink)
Patterned Paper: Easter Word Play (Adorn It)
Clear Stamps: Egg Hunt (PaperTrey Ink)
Ink: Berry Sorbet, Summer Sunrise, Plum Pudding (PaperTrey Ink.)
Other: Foam Dots, Corner Chomper (We R Memory Keepers)
April 18, 2011
Make It Monday Challenge #11 - April 18
This week Heather Nichols demonstrated using the reverse of dies to emboss cardstock for a completely new look. She also demonstrated how to use both sides of the dies to create dimension. For my card this week I used Melissa Bickford's Flower Fusion #1 die and stamps. When I first tried this technique the die was leaving a silver residue on the embossed image. After searching the Papertry Ink forum I found a post with a suggestion of placing a piece or parchment paper between the die and my cardstock piece. Voila! No residue, it worked perfectly. I embossed the flower on a piece of Sweet Blush cardstock, then a used the co-ordinating stamp and stamped with Berry Sorbet the inside of the embossed image. I then traced the embossed image using a clear Jelly Roll pen. I need to work on my aim when stamping on or inside a die cut shape. I really love the colours of this card, they make me happy. A really fun technique that adds extra value to your dies.


All Supplies from PaperTrey Ink unless otherwise noted:
Cardstock: White, Sweet Blush, Berry Sorbet
Stamps: Flowers Fusion #1
Ink: Berry Sorbet, New Leaf, Fresh Snow, Tuxedo Black (Mimento)
Die: Flower Fusion #1
Ribbon: Berry Sorbet Swiss Dot
Other: White pearl, Martha Stewart Border Punch, Corner Chomper
April 4, 2011
Make It Monday Challenge #9 - April 4
Make It Monday Challenge #9 - April 4

All Supplies from PaperTrey Ink unless otherwise noted:
This weeks Make It Monday Challenge was heat embossing demonstrated by Dawn McVey. Heat embossing has to be one of my favourite techniques. I Hope you enjoy the card I created for this weeks challenge. I embossed in white, clear and gold.

 |
| |
Cardstock: White, Spring Rain
Stamps: Up, Up & Away
Ink: Versamark
Die: Up, Up & AwayOther: White, Clear and Gold embossing powder, Assorted Copics, dimensional adhesive
Stamps: Up, Up & Away
Ink: Versamark
Die: Up, Up & AwayOther: White, Clear and Gold embossing powder, Assorted Copics, dimensional adhesive