February 29, 2020

Crafty Friends are the Best - February '20


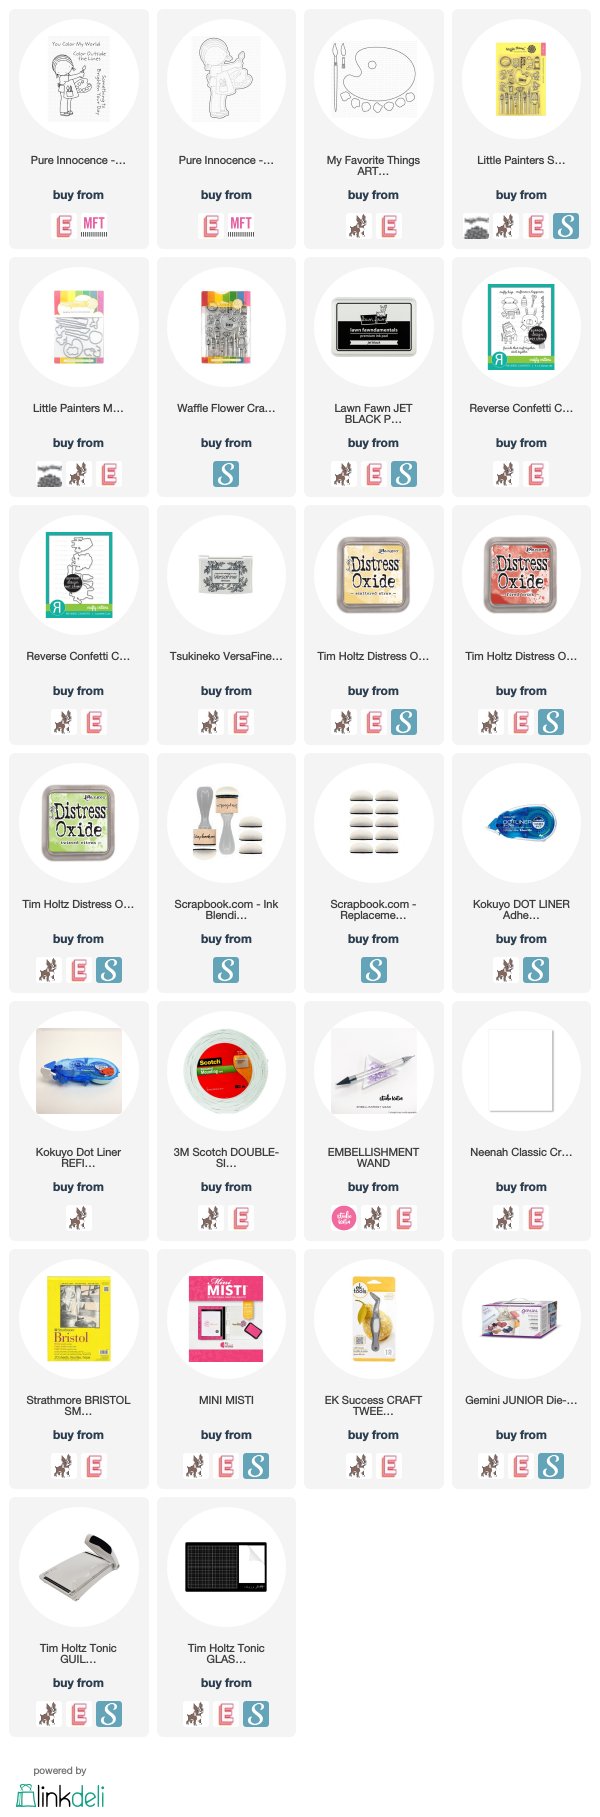
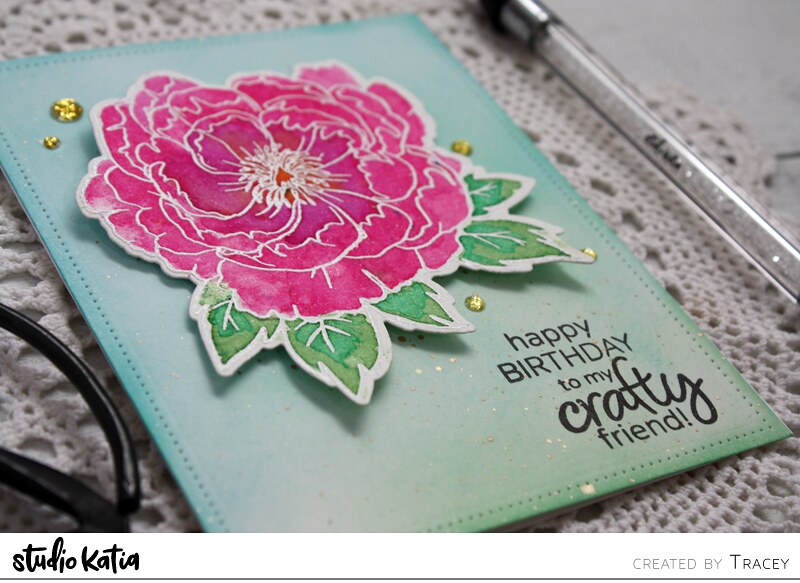
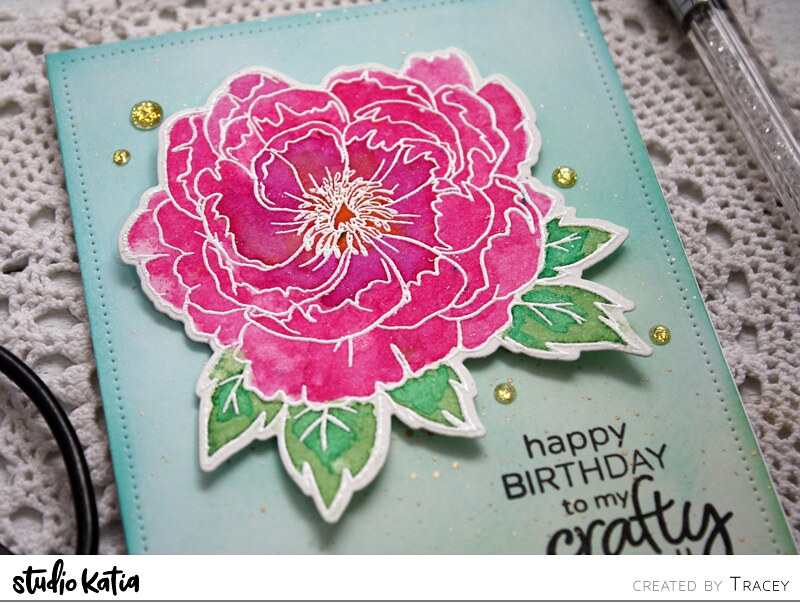
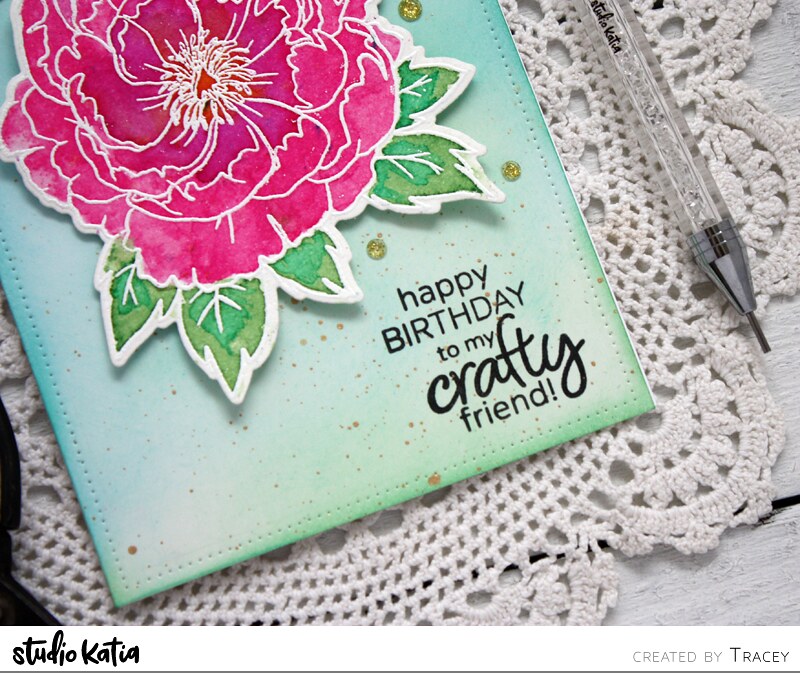
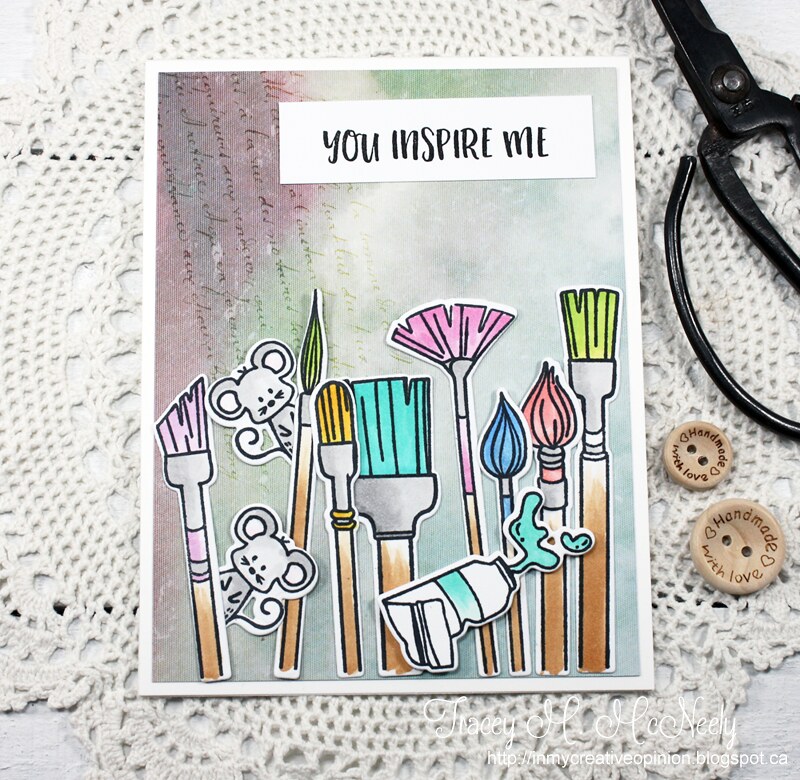
It's the last day of the month and that means it's time for the February edition of the 12 Kits of Occasions! Fabulous Jeanne Jachna, A Kept Life, is our  hostess this month and as usual the kit she sent to all of us to use was over the top! Gorgeous Vicki Boutin Kaleidoscope patterned paper, stamped sentiment and images, die cuts and embellishments! We have all made so many friends through this wonderful hobby and what a better way to celebrate it than to create with a kit themed after crafty friends!

I have been in a bit of a crafty slump these past couple of months but working with Jeanne's fabulous kit full of lots of new to me product was just the boost I needed. I still have ideas for at least five more cards, maybe on our next leftover month!

Here they are...


tracey_12K1


tracey_12K2


tracey_12K3

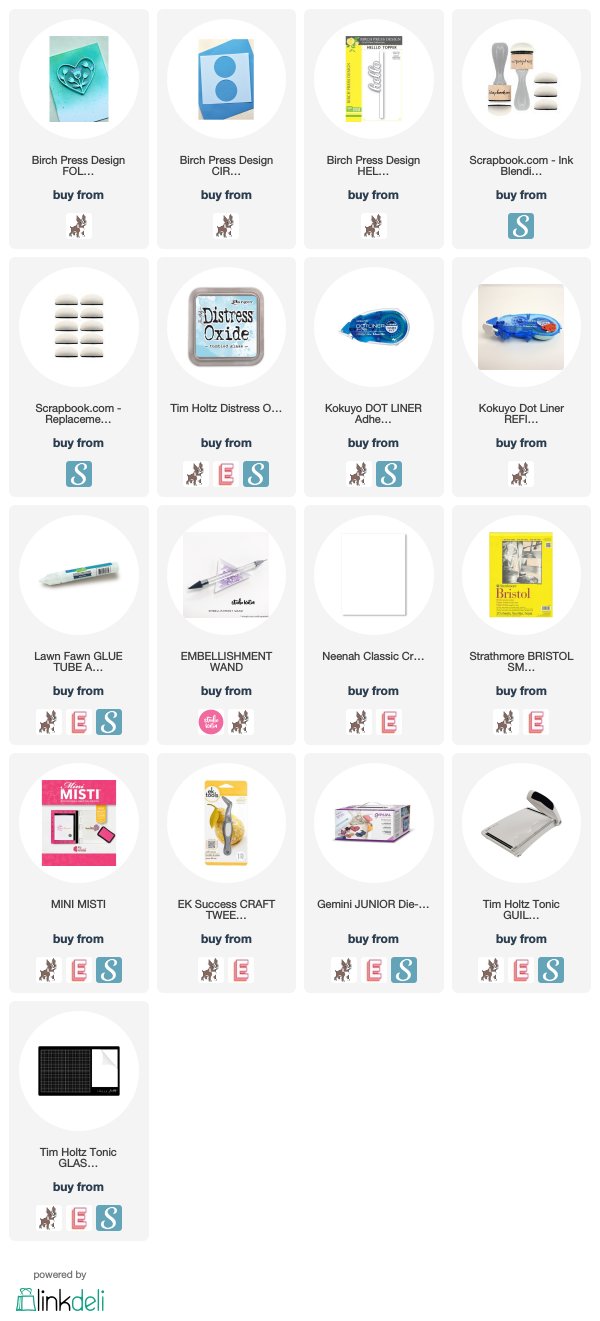
This card is for the CAS(E) this Sketch #361!


tracey_12K4

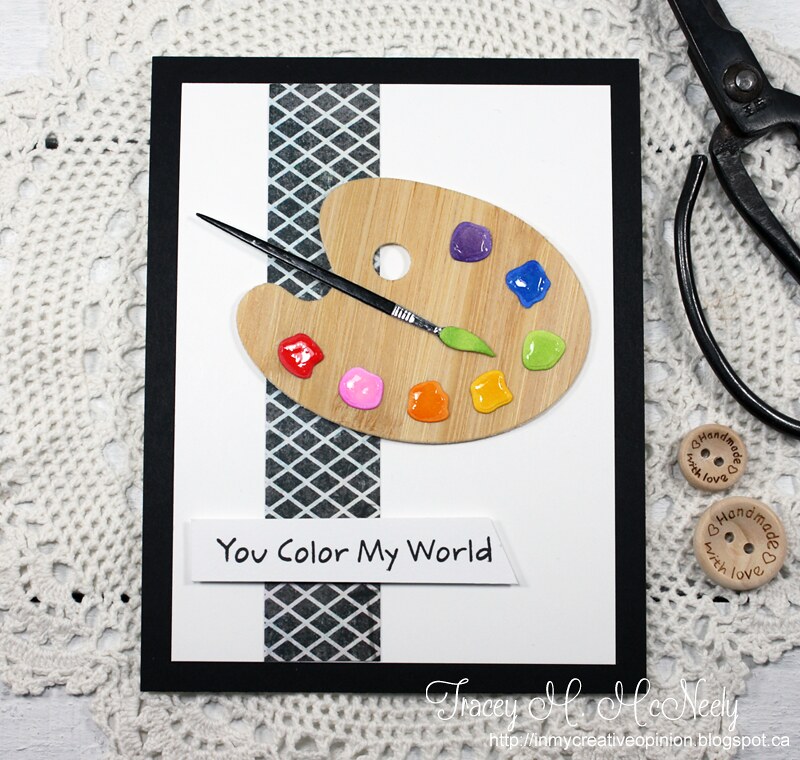
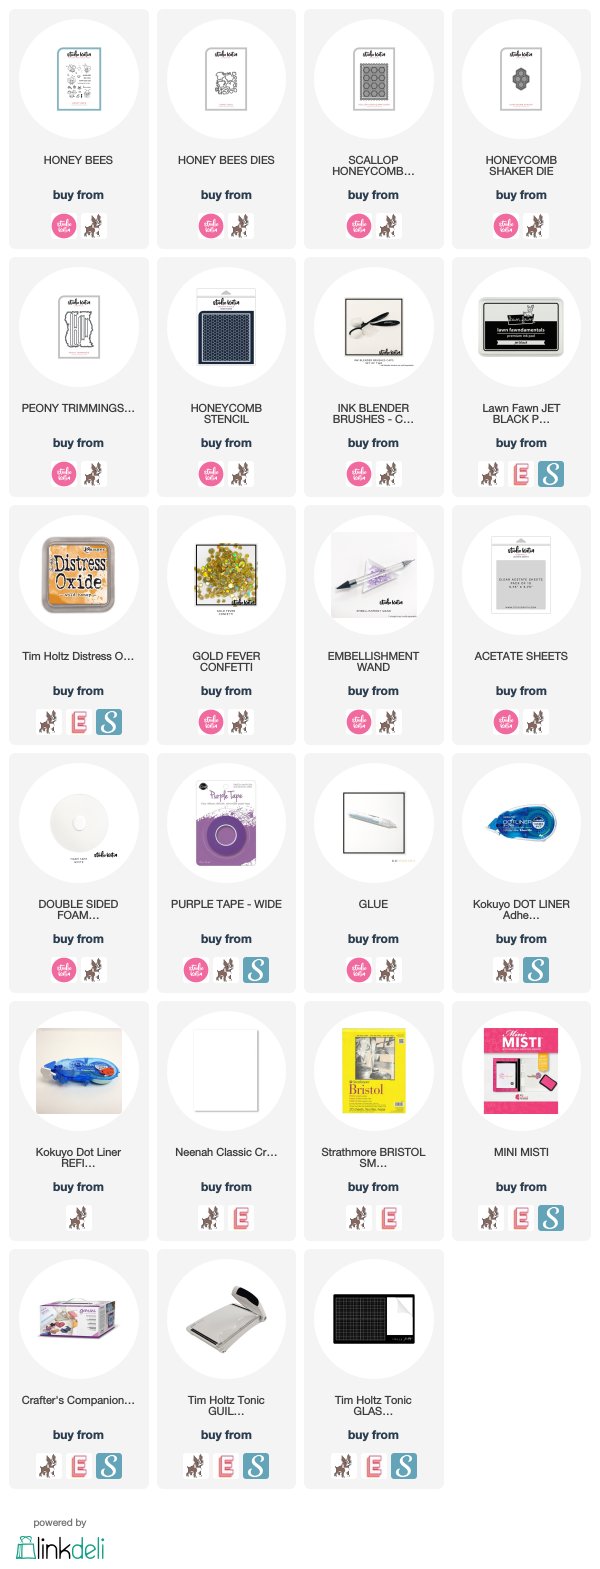
This card is also for MFT Stamps Wednesday Sketch Challenge #478.
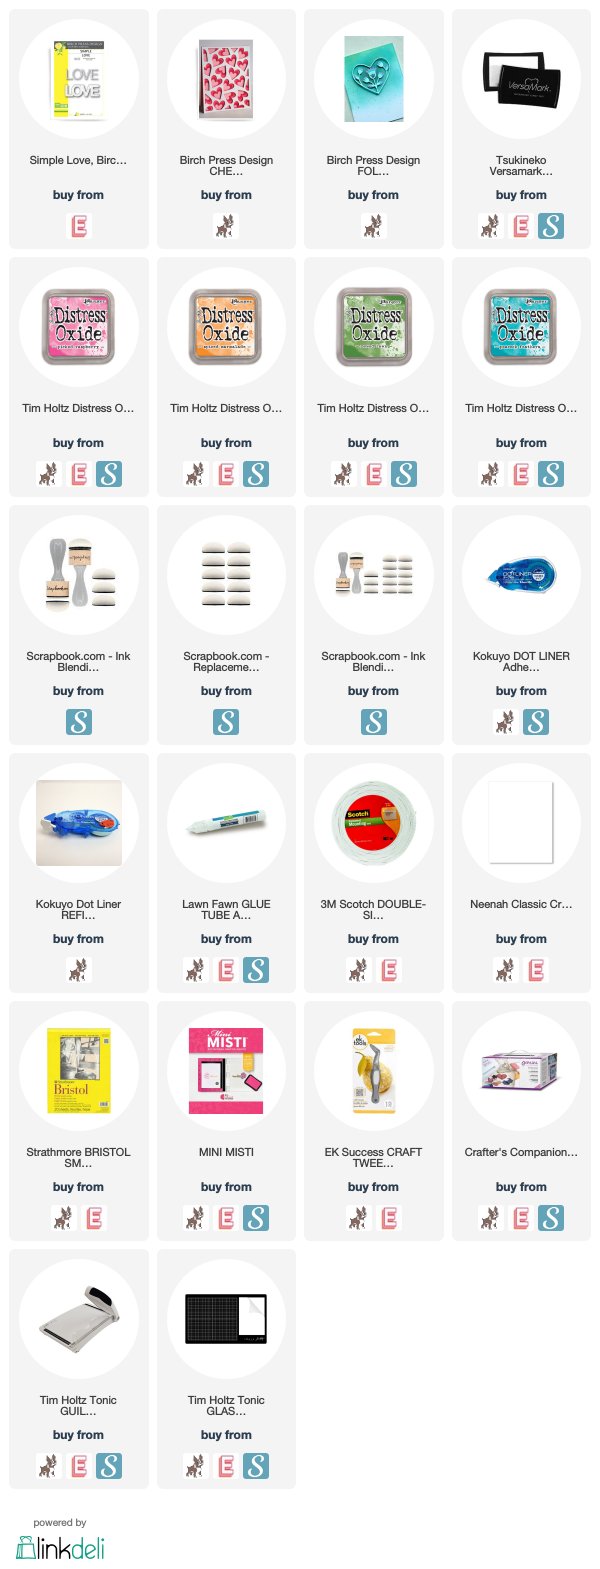


tracey_12K5


All together...

tracey_12K_group


Thanks so much for stopping by today but before you go please take some time to visit the 12 Kits of Occasions blog to see what the rest of my amazing teammates have created with this month's kit. Thank you Jeanne!


February 27, 2020

Creating a Custom Background with Stencils


I have a card and tutorial up on the Birch Press Design blog today!

When I was planning my card for today I was thinking spring, but as I finished up my card a big snowstorm was blowing in. We haven't had as much snow this year as we usually do, but in the last 24 hours we have gotten about a foot of snow and it is still snowing. Hopefully March is coming in like a lion and going out like a lamb!


To create my custom background I used the Circle Burst stencil to ink blend over a panel of Bristol Smooth cardstock using only one colour of Distress Oxide ink (Tumbled Glass).  Using a geometric shaped stencil allow you to customize your results. I randomly moved the stencil over the panel and ink blended until the entire panel was covered. I flicked some watered down Perfect Pearls with a paintbrush to the panel to add a little bit more interest. Some areas ended up darker and some areas more white but the result was a pretty backdrop for the layered tulips.


I cut the Folk Art Heart Layers from dark pink (Layer C), light pink (Layer A) and the light pink from the Delicate Pastel Glitter Pad. I glued the layers together with liquid glue. 

The hello is from the Hello Topper die and it was cut once from black and once from white. The two pieces were glued together slightly offset to create a shadow so it would stand out on the card front. 


The stenciled panel was trimmed down to 4" x 5 1/4" and adhered to a top folding white card base. To finish the card off I attached the layered tulips and the sentiment to the card front.


Thanks for stopping in and I hope you head over to visit me at Birch Press!


February 22, 2020

Honeycomb Shaker

I am up on the Studio Katia blog today with a shaker card using some brand new products from Studio Katia!


To create my shaker card I needed to work backwards because I wanted my stenciling to show through the windows of the shaker. I started off by cutting a panel of white cardstock with the new Scallop Honeycomb Cover die. Next I cut the Honeycomb Shaker die from my panel on an angle and then I inlaid all the pieces back into the panel.

Then I placed the Honeycomb Stencil over the panel and secured it to my work surface with some Purple Tape. I blended Wild Honey Distress Oxide ink selectively over the panel with all the inlaid in pieces in place. I removed the four centre hexagons. A piece of patterned paper was adhered to a white top folding card base and I laid the remainder of the scallop die cut over the centre of the panel. Glue was added to the four hexagon spaces and the four hexagons adhered through the top panel.


To continue building the shaker I adhered a piece of the new crystal clear Studio Katia Acetate to the back of the scalloped panel over the opening. Then the two most outer rings of the die were inlaid into the top panel over the window with Studio Katia Liquid Glue. I used a double layer of Studio Katia White Foam Tape to build the walls of my shaker on to the back of the scalloped panel. A double layer will give the shaker contents lots of room to shake around! The card base was brushed with an antistatic tool and a couple of spoonfuls of the new Gold Fever Confetti were set over the hexagon pieces. The top scalloped layer was added to the centre of the card to complete the shaker.


A few of the images from the Honey Bees stamp set were stamped and coloured with Copic markers --Y13, Y15, Y17, T2, T4, T6, B0000, B00. Then the images were cut with the matching Honey Bees dies and adhered to the card front with foam tape. The sentiment from the same stamp set was white embossed on black cardstock and cut with a sentiment strip from the Peony Trimmings die set to finish the card off!


February 12, 2020

Rainbow Love


Hi there, I'm up of the Birch Press Design blog today sharing an all die cuts card and video tutorial using the Flora Heart Layers die set, the Cherish Plate die set and the Simple Love sentiment die.


I added the heart and the sentiment to the card base. Leaving the card like this allows you to customize the inside to say whatever you want for the occasion. Thanks so much for stopping by today and watch the video below for more details on how I put this card together.

Head over to the blog to see  how I created my card or watch my video on my YouTube channel so you won't miss any of the details.


February 3, 2020

Birthday Wishes for a Crafty Friend

tracey_craftyfriend_angle

I am up on the Studio Katia blog today. I hope you have a chance to pop over and see my card and all the new products from the January release!

As you read this post the groundhog has already come out of his burrow and hopefully did not see his shadow where you are! Wiarton Willie, our groundhog, says early spring! Yay!

I have been busy reorganizing my studio this past month, a great job for the winter. Of course once I started going through my craft supplies I found things I had almost forgotten about. When I came across my watercolour powders I decided to use them for my post this week.

tracey_craftyfriend

It is so much fun to watercolour flowers with these powders. I started out stamping and white heat embossing the main flower of the Japanese Peony stamp set onto a piece of watercolor paper. Then I die cut the image using the co-ordinating Japanese Peony creative dies. I sprinkled pink, raspberry, light and dark green watercolour powder on to my craft mat in separate areas. When using watercolour powder, a little bit goes a long way--just a couple light taps. I added clean water to the powder with a painbrush then watercoloured the flower. When it was partially dry I went back in again and added a bit more colour to some areas to add a bit more depth and dimension. I set it aside to dry fully while I prepared the background for my card.

tracey_craftyfriend_top

Using the Studio Katia Ink Blender Brushes I ink blended my background using Distress Oxide inks and Bristol smooth cardstock. Then I flicked some watered down gold watercolour paint on to the panel and set that aside to dry. Once it was dry, I cut the panel with the largest rectangle from the Darling Ribbons & Frames cover die. This gives a nice stitched border all around the frame.

The sentiment is from the Birthday Greetings stamp set which was stamped on the card front before it was glued front of the white card base. Studio Katia Double Sided Foam Tape was added to the back of the flower before it was attached to the card for a little more dimension.

tracey_craftyfriend_bottom

To finish the card off I used my Studio Katia Embellishment Wand to add a few Gold Sparkle Crystals around the flower for a little extra pop.


tracey_craftyfriend_angle

Thanks for coming by and have a great day!