April 26, 2021

Mother's Day

Hi there and Happy Monday!

My first Mother's Day card for this year using the colours from the Color Hues Challenge #16. This is my second card for the challenge, but also the first card I made. I used the fun new Concord & 9th Three Step Blooming stamps and dies using two shades of yellow and grey for all the foliage. I stamped the images and die cut with the coordinating dies. All supplies are listed below for your convenience.


The background is Concord & 9th Plaid Background stamp set. So sad that this is the first time I have used that stamp set. I'll be using it a lot more now that I see how fun it is.

After the background was stamped and it was trimmed to 5 1/4" x 4" and mounted to a dark grey panel. No it's not black, the camera has a way of changing grey to black when it smiles. ;) The heart was added with foam tape for a bit of dimension.


April 23, 2021

Floral Birthday

 Happy Friday!

Today I have a card I made the Color Hues Challenge #16 and I made it a birthday card to also submit to Seize the Birthday #212 - Spring Flowers and the pastel yellows for The Flower Challenge #55 - Pretty Pastels. Slowly I am rebuilding my supply of birthday cards. The funny thing is that there is always a pause when I go to make birthday cards. I love making floral cards, but I also like making cute and funny cards too.

What do you do when you think out when you go to make a new birthday card?
Do you make your cards for your recipient, or do you make cards to have on hand?Or do you choose a theme for your card to build of a supply? 

Do you like flowers? or critters? a geometric shapes?
So many questions, I am always curious of how other creators, create!


The colors for Color Hues are Yellow and grey. I will be honest, this was a tough challenge for me. I'm not much of a yellow person, but once I got out all my yellow inks and started playing around I really liked the yellow with the grey. Of course yellow isn't the easiest colour to take good pictures of, but many takes later I chose the photos I am sharing here today.

I brought out an old favourite, Altenew Floral Art, I have always loved the whimsy of this set and with a bit of masking and overstamping it always makes a pretty card.

I stamped the main large layered flower in Altenew Silver Stone, Buttercream and Warm Yellow inks. Then I build up the rest of the card front in the upper left of the panel mixing in some of the other flowers and leaves in the set using the same ink colours along with Altenew Lava Rock.

I trimmed down and added the panel to a dark grey mat. A few Stormcloud pearls from Studio Katia were added to create a bit of interest.


Thanks so much for popping in today and have a wonderful weekend.
We are heading into some warmer weather and hopefully the cooler winter weather we has this past week was it's last hurrah!


April 16, 2021

Birthday Tulips

Happy Friday! I hope that you are seeing the tulips blooming in your garden. There is lots of green popping up in my garden but living in the woods I never know exactly what it is, until it blooms! Spring came a bit early this year so maybe they will all bloom at once.


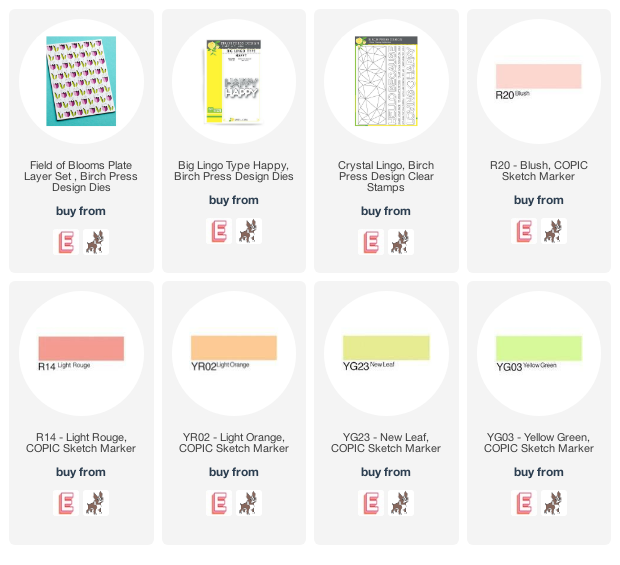
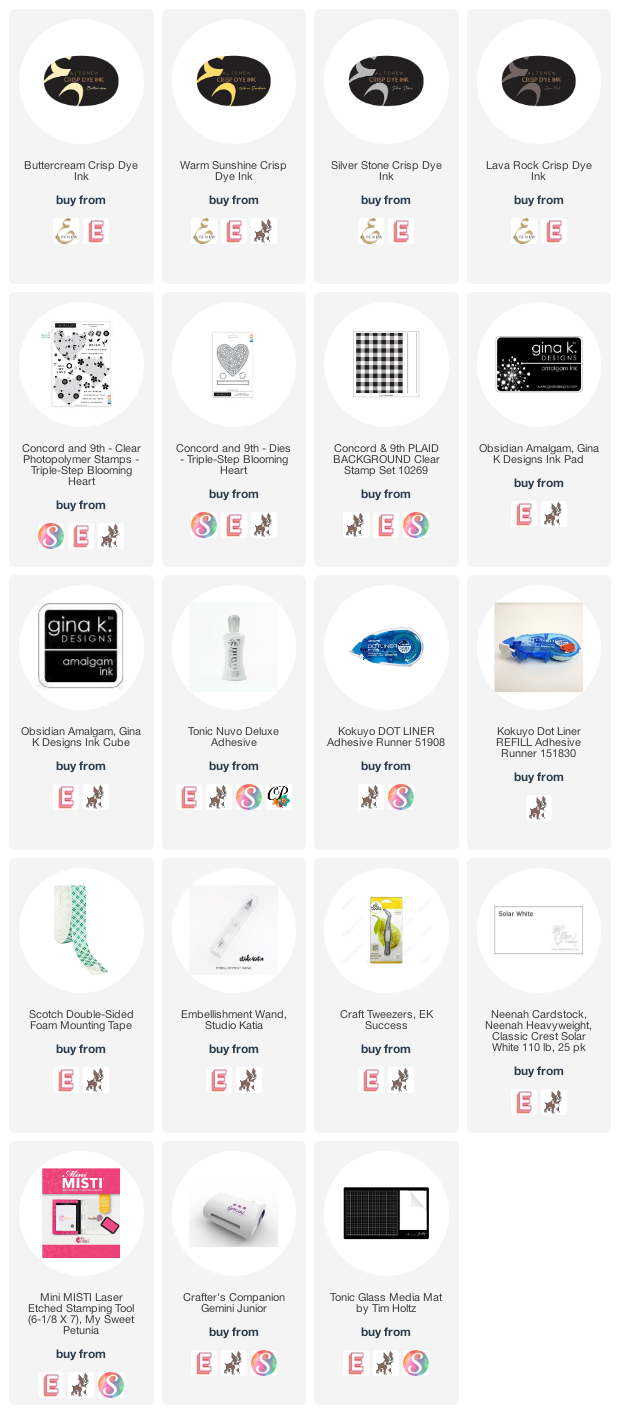
For today's card I used Layers A and C of the Birch Press Design Field of Blooms die set. I started out by dry embossing Layer C on into an A2 sized piece of white cardstock. Dry embossing gives a similar effect as using an embossing folder, but usually it's not as sharp of an image. For all intents and purposes this works out just fine.


Using Copic markers I coloured over the image that was embossed so that the colours would show through Layer A which is on top. I didn't worry about colouring perfectly, in fact my colouring is quite messy, but because it is being covered with Layer A there is no need for perfection. The picture below was my practice piece so that you can see what I mean by messy. I changed the colour scheme on a new embossed panel and realized I didn't snap a picture until I had glued all the layers together, but this gives you an idea of what I did.


After I finished colouring I set the panel aside. I die cut two of Layer A from white cardstock and then glued the two layers over Layer C. The whole panel was then glued to a top to an A2 top folding card base. 


The sentiment is made up of the Big Lingo Type Happy. I cut three of the shadow using white cardstock and glued them together to make the word chunkier then I cut the detail layer from black cardstock. The second line of the sentiment is from the Crystal Lingo clear stamp set. It was white heat embossed on black cardstock and trimmed down.

Happy was glued directly to the card front and the second line was popped up using foam tape. Now the card has both positive and negative dimension. Positive because both lines of the sentiment protrude and negative because the two top layers add negative perspective of the tulips!


Thanks so much for stopping in today and crafting with me.  Take another look at your layered cover die sets and think of ways you can mix and match the dies. Whether you are adding more layers or using less, or even cutting multiples of the same layer--one change can create a completely different look!

This is also colouring for Kathy Racoosin's Daily Marker Mini 30 Day Coloring Challenge and well as for the current Seize the Birthday #212 Spring Flowers.


April 12, 2021

Spring is in the Air


I feel like I haven't made a card in a long time, just because... So no better way to get back into again to find one, or two or even three challenges to play along with. 

I made a card for a few challenges--Inspired By Challenge IB169 Spring Is Sweet, Color Hues Challenge #15 and Simon Says Stamp Wednesday Challenge - Happy Birthday! This is the 12th Anniversary of the Simon Says Stamps Wednesday Challenge.

With the weather getting better outside I decided to make a flower the focal image of my birthday card because my supply is getting low. Flipping through my flower stamps I found the Amaryllis set from Pretty Pink Posh that I have never used.

I started out by stamping a black clear embossing all the images that I was going to use on to a panel of Tim Holtz watercolor paper. When I clear emboss in black I start by covering the entire stamp with embossing ink. Then before stamping it down, I cover the entire surface with VersaFine Onyx black ink. This extra step may not necessary but I have always done it this way and always get a good impression! 

Before cutting the images, I taped the watercolour panel down to an 8" x 10" panel of particle board with Frog Tape. I find this helps keep the watercolour paper flat. I used Distress Inks and my watercolour medium. I just squish some ink on to my craft mat and pick up the colour with a wet paintbrush.


Once the panel is dry, I die cut all the images and then lay the images over a white top folding card base. 


Once I like the arrangement I adhere the images and add a sentiment--done!


Thanks so much for stopping in today to craft with me.


April 9, 2021

Refresh

Happy Friday!

I don't think I am alone when I say I have several boxes of cards that I've made over the past...wells forever years! Although I'm good at passing them on, maybe not so great at signing and mailing them out. I was going through some of my older cards looking for a few sympathy cards. My least favourite to make, especially when one is needed.

My card making style has changed over the years. I am still a CAS loving designer first, I love my white space, but some of my older cards look like they need a refresh! I pulled out a sympathy card I made a couple years ago and I gave it an update before sending it off.

Here is my original card, posted on April 4, 2018!


To give the card a more current feeling, I cut the front off of the card to make it into a 5 1/2" x 4 1/4" panel. I die cut the panel with largest die from The Greetery's Nordic Frames dies. 

I added the cut panel on to a white top folding card base with foam tape for a bit of dimension. By cutting the original card front into a die cut panel and adding a bit of dimension, I took a card that was already beautiful and gave it a fresh new look.


Have a great weekend!